Guides
ON WATER GARDENING

Design Tutorial
Put Your Ideas on Paper
Because water gardening is relatively complex and expensive compared with regular gardening, it's never a good idea just to start digging. You don't need a degree in landscape architecture to draw very accurate, and very nice-looking, landscape drafts. Indeed, Gertrude Jekyll, a renowned English landscaper, used only good measurements, a few watercolours, an ink pen, and her mind's eye. Whether or not you do as she did, or just get close enough with a pencil, it pays to plan ahead in water gardening.
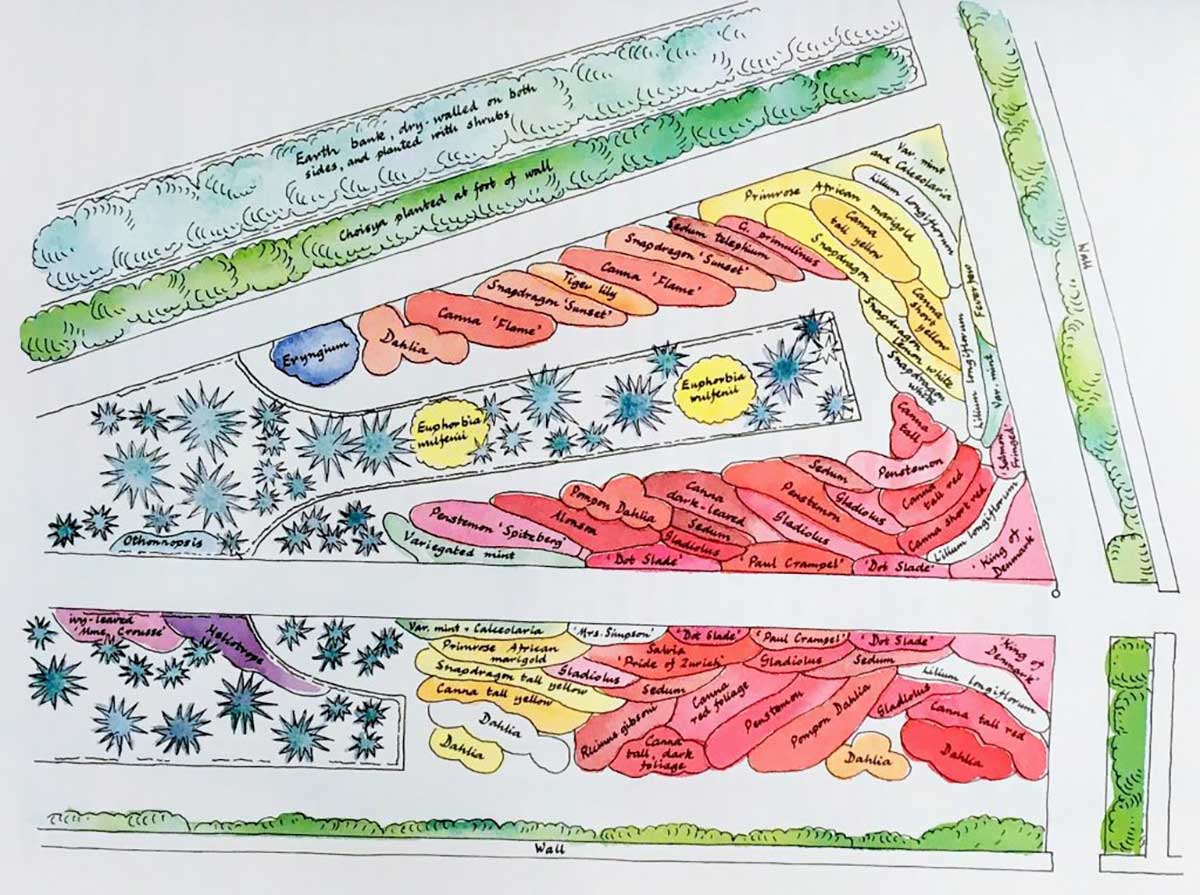
SOURCE : Jekyll, G. (1988). The Illustrated Gertrude Jekyll: Colour Schemes for the Flower Garden. 1914. Illustr. by Charlotte Wess.
Step 1 : Measure the perimeter of the area that you intend to landscape using stakes and a long tape measure. Measure all existing features within this perimeter, such as trees, shrubs, walkways and flowerbeds. Do not forget to measure the distance of each feature from the perimeter (so that you can place it properly in your drawing) and to take into account the canopy of each tree, as the shade produced will affect your plant choices.
Step 2 : Convert feet or meters into inches or centimeters and find the largest scale possible that will fit the piece of paper on which you will draw.
Step 3 : Delineate your work area by drawing in the perimeter, and then fill in the existing features with your actual and relative measurements. Label each feature. What you now have before you is a miniature replica of your yard; you are now free to use your imagination. By the way, if you do plan on using watercolours to express the colour of your plantings in bloom, don't forget to use specially made moisture-absorbent watercolour paper.
Decide on Size and Shape
The main rule to follow when building a lily pond (and not just a good sales pitch) is this: make it as BIG and as DEEP as you are able. Gardeners tend to be too conservative with their first pond (probably because they have yet to become water gardeners). Once people see the beauty and life that water brings to the garden they often wish they could start again and build a larger, more elaborate pond--and many do. But that is not to say that you should get in over your head! The general depth of the pond should not be less than 18 inches (45 CM) and the central part(s) should be at least 30 inches (75 CM) deep if you live in a continental northern zone and intend to winter over fish. Likewise, but for opposite reasons, water gardeners in southern or desert climates need to build their ponds as large and as deep as possible to avoid cooking their contents. A greater depth enables you and your garden's visitors to suspend the disbelief that you have a real spring under your suburban backyard. No one wants to see a black liner just below the surface. Make the shape of the pond interesting. Circles, squares and other simple forms look best in a symmetrical, formal setting. Avoid the ubiquitous kidney shape. Use your imagination—a pond with a lagoon shape could accommodate a bridge, or one that abuts a patio could be half straight edge, half curved-edge. This is one aspect of water gardening where you can actually improve upon nature.
Consider Your Edging
Edging is the most important aspect of your pond, and it is where all the artistry in pond building lies. Your edge will determine the pond’s longevity and overall look, as well as the types of wildlife that may frequent it. First: what to avoid. Many sources advocate the shelf system of water garden design. The point of this method of excavation is to get maximum volume from what is usually a very limited surface area, while giving you a flat area to place potted aquatic plants. And it does work. However, it does so at the expense of the pond itself because it forces the water gardener to create edging that is both unsightly and unstable.
It is the shelf system of pond building that requires people to ring their ponds with whatever type of field or paving stone they have about in order to cover up the pond liner protruding from the water. Unless the pond sits in a very formal garden, this effect is nearly always unnatural and amateurish.
Furthermore, from an TYPEering standpoint we have found that the pressure of the water on the liner is not great enough to ensure that the shelves will hold their shape over a period of years. The right angles required for shelving are not natural and the elements will conspire with people and animals to make sure that they disintegrate. Once they do begin to fall apart your liner will shift, further destabilizing the edging and leading to leaks. Shelves have been known to collapse in a muddy mess when the weight of a person standing on a heavy masonry edge is too much for the soil to bear. Despite what you may read in catalogues and guides, it is therefore our opinion that you should think twice before using the shelf system.
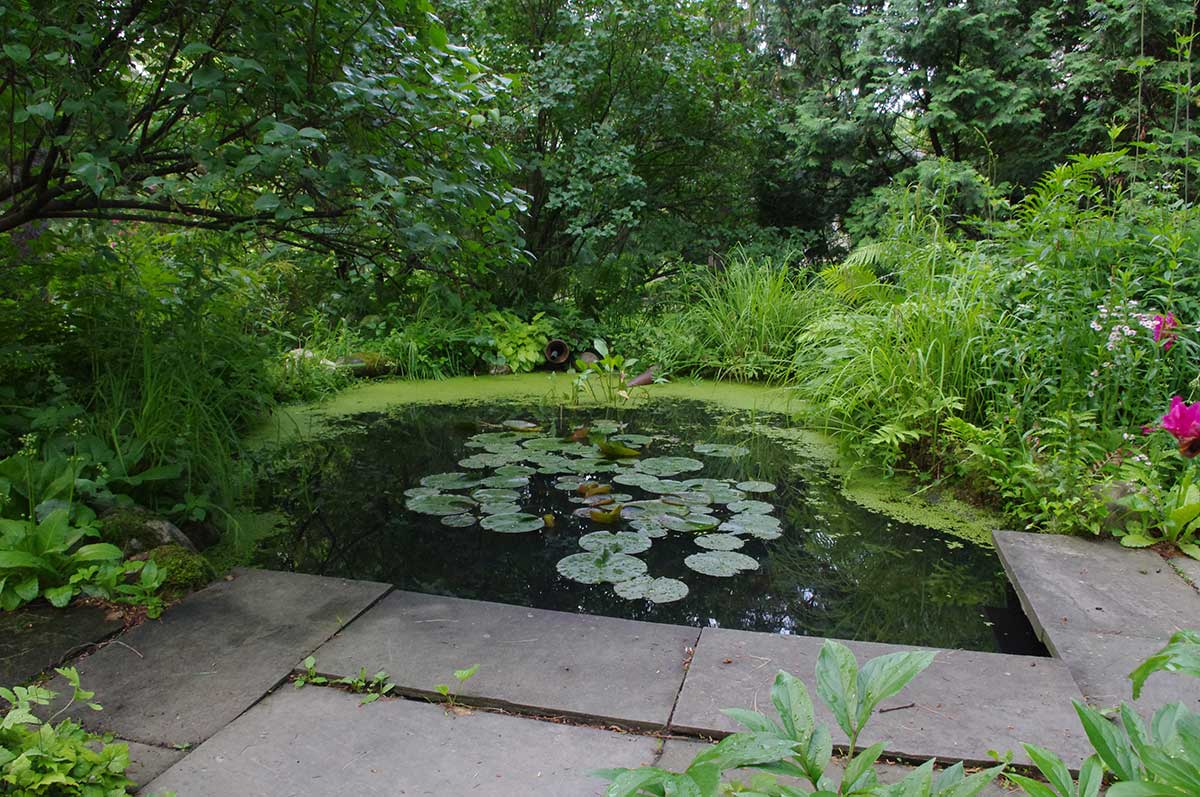
In our view, the best method of edging is that which appears to be no edging at all. Mimic nature when you dig your pond and make the deepest part (or parts, if it is a large pond) in the middle and from there make the slope of the pond gradually shallower until it meets your edge.
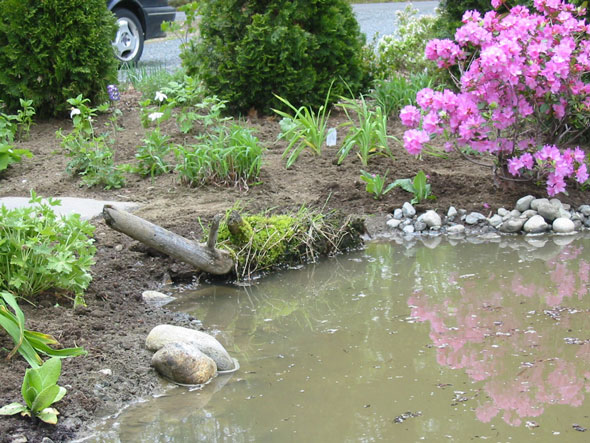
The gradual grade of the pond's slope and the below-water edging will make a durable and natural edge to your pond, and the boggy area will add another dimension to your water garden. It will also make it more desirable and accessible to animals (for better or worse), such as amphibians and birds. It should be noted here as well that using the transitional zone to edge your pond will lead to some small water loss, as the soil and plants will pull water from the pond. Rain usually compensates, but in the event that it does not, most people find that having to top off the pond occasionally is a small price to pay for the beauty of this type of edge.
Select a Water Circulation Method :
It is vital that your pond has a means for the circulation and aeration of its water—without one, it can become a stagnant breeding ground for mosquitoes. For most ponds, a number of different circulation methods are possible, but make use of the terrain around your water garden if it is better suited to any one type in particular.
For people who are lucky enough to have a constantly replenishing natural spring or stream, the sky is the limit: simply create a place for the water to enter and exit the base pool and build your circulation method separately using pumps.
For those who are not so lucky, our advice is to keep it simple. If too many leaves fall in your ten-foot streambed and you start losing a few drops of water here and there, you will soon find your pond empty. Likewise, if there is too much splash generated by a complex or large system of waterfalls, you will be surprised at how fast your pond loses water.
Southern or desert water gardeners should not build streambeds or complicated waterfalls out of rocks unless the pond is very large or in the shade. The sun will heat the rocks quickly bringing the temperature of the water to the danger point. Below are four methods of water circulation that are efficient, beautiful and easy to install in any pond.
The pipe waterfall, pictured above, has a certain Zen quality to it that is very appealing, and it works in both natural and formal settings. Ambitious water gardeners may opt for the sought after cascading waterfall effect. Waterfalls like the one pictured below require more maintenance than other circulation methods because leaves can cause water to back up and stones will shift from animals and frost, potentially causing leaks. You will also lose more water to evaporation and splash. But for those willing to fiddle, the waterfall option is often worth it.
The stream method is a good way to create the illusion of a spring-fed pond in your backyard. It's simple to construct but requires some work to maintain. Avoid making your stream more than five feet long and two feet wide, even if you have a larger pond; they are easily clogged by debris and disrupted by animals (unless, as was mentioned before, you have a natural water source).
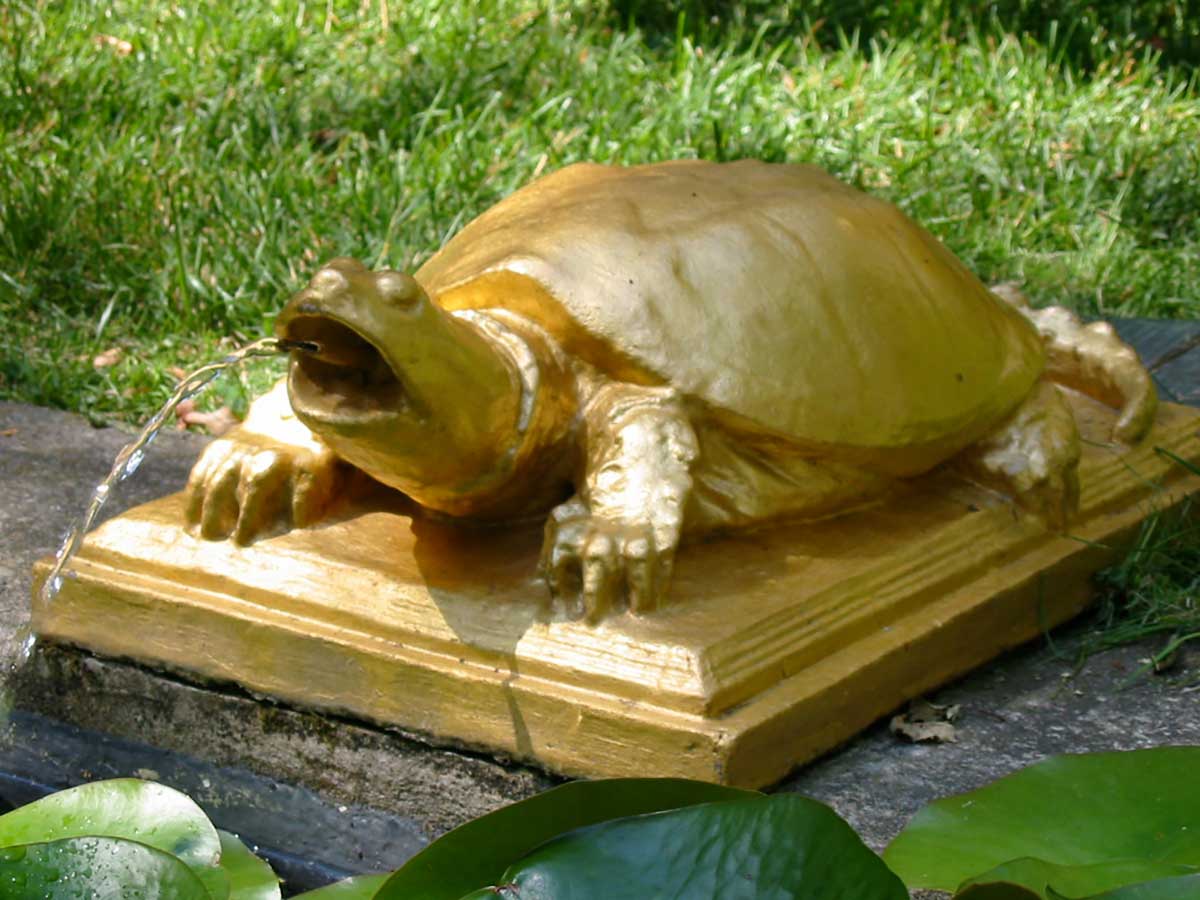
Fountains are the last and most straightforward method of water circulation we will discuss. They are ideal for formal ponds where a stream or waterfall would look out of place, and they add the same motion and sound to the garden. Are fountains right for any pond? Yes and no. It is possible for a fountain to work in a natural setting, but this usually involves a piece of statuary or some variation on the previously mentioned pipe method.
And little fountains are the perfect solution for container gardens and other small water features. But the elegance of a vertical spray fountain is most appreciated in a very formal setting.
Construction Tutorial
Levelling and Excavation
While building a lily pond requires hours of back breaking shoveling, it is in many ways less of a chore than building a proper perennial bed (if you're building both at the same time, forget this bit of optimism). After all, a perennial bed not only requires that you remove sod and dirt, but that you add tons of soil as well. Provided that you are fit, or that you have access to free labor, even ponds considered quite large can be dug by hand in a day or two. However, if the pond is on the larger side, or if you are considering paying people to dig it for you by hand, by all means rent a mini backhoe. These vehicles are easier to drive than a car and you will have your pond excavated in hours, not dayss. Before the excavation can begin, you must delineate the shape of your pond. The best way to do this is to use your garden hose to make an outline, and then mark the shape with a shovel in the dirt or sod. Remove the sod or top few inches of soil before you begin to dig in earnest, so that you don't lose the shape.
Once you have begun excavating, you will need to make sure that the edges of the pond are level. Unless the building area is basically flat, don't try to eyeball it. Depending on the terrain, a difference in level when you fill the pond can mean lots of extra work. We recommend using a line level or a water level to get the height of the edges right. Using a line level: hammer a stake into an edge that is at the desired level. Run your string from that level point to stakes at various points around the edge of the pond. Using the line level, mark on these stakes the level, and use them as a guide as you dig. You will make the final adjustments to the level when you fill the pond with water and do the edging.
Making a water level: a water level is a clear plastic tube of the same variety that you use for your pump. To create a water level, buy a 20- to 30-foot (6 to 10 metre) piece of 1/4 to 1/2 inch (1 to 1.5 centimetre) clear flexible tubing (depending on the size of your pond). Attach one end of it to a wooden stake using duct tape. You will tape down the last twelve inches of the tubing to the stake, making sure that there is at least a 5-inch (10 centimetre) "window" in that space that is not taped over, so you can see the water level. Draw a line next to the tube on the stake: this will be your level. Hammer the stake into the ground so that the mark you drew on the stake is at the exact point where you want the level of the water to be. Fill the tube with water. As long as the water in the tube is at the line you drew on the stake, the point at which you're standing with the other end of the tube is at the same level.
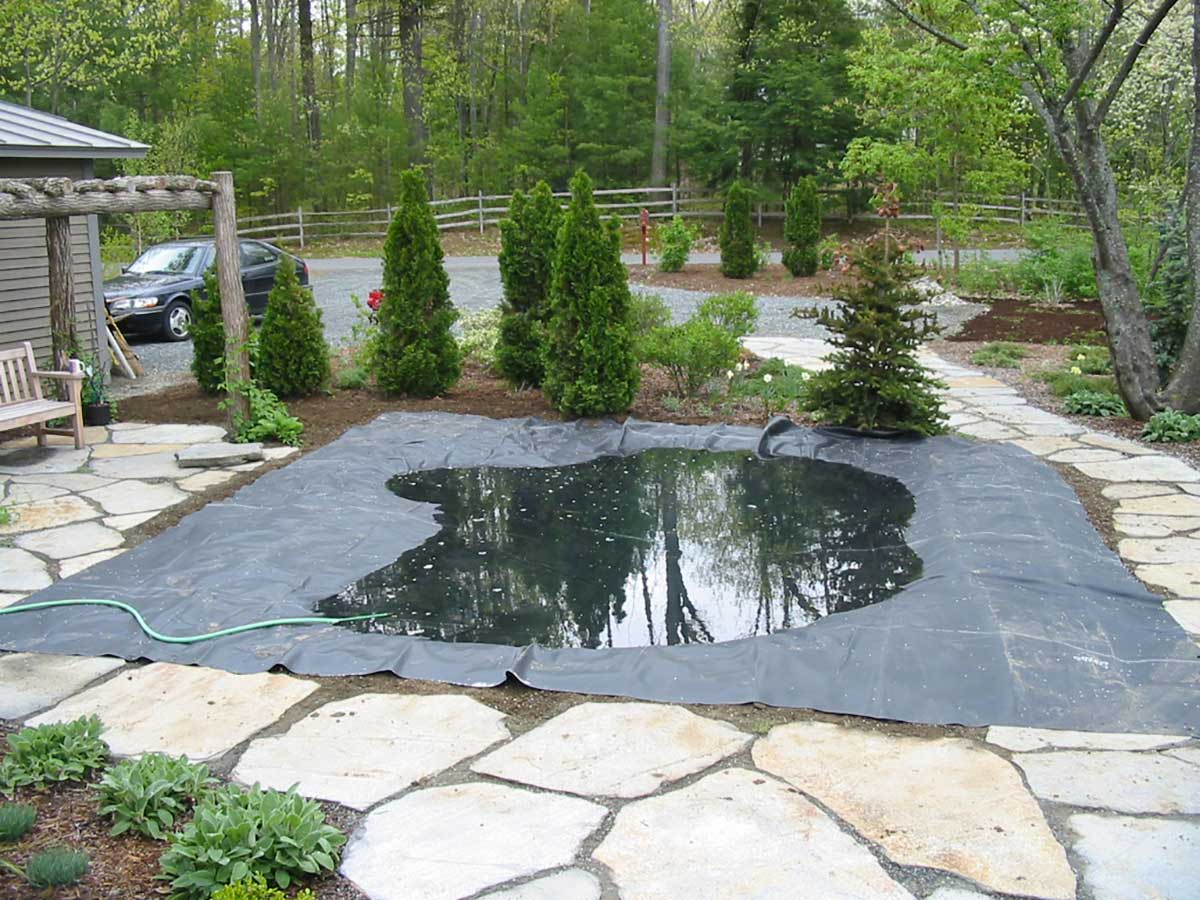
Lining the Pond :
Now that the pond has been excavated and the edges are as close to level as possible, you are ready to line the pond. The first step in this process is to calculate the dimensions of the liner that you will require. The formula for this calculation is simple: add twice the pool's depth to each dimension, plus two feet or one-half metre to allow for edging. If you will be building an extended bog area do not forget to take this into account in your calculation.
Because most ponds are not rectangular, use the dimensions of the smallest rectangle in which the shape of your pond will fit. When calculating depth, use the deepest measurement, or close to it. There is nothing wrong with having extra liner; it will allow you some last-minute or future creative license, either in altering the shape, or adding a different circulation method.
LINER SIZE : ADD TWICE THE POND'S DEPTH PLUS 2 FEET OR ONE-HALF METRE FOR EDGING TO THE WIDTH AND LENGTH OF THE POND
Many pond owners are choosing to use an underlining when they line their ponds. This can only extend the life of your pond. The 45 mil gauge EPDM liner that we recommend is extremely tough, so if your soil is not too rocky you can get away without an underlining. However, if your soil is rocky, or if you have chosen to use a thinner gauge liner, we strongly recommend an underlining
The three most common types of underlining are sand, foam carpet underlining, and geotextile underlining. The last two are the most effective. If you have old carpet underlayments or polyester blankets lying around, by all means use them. But if you have to go out and buy carpet underlayment you will find that geotextile underliner is less expensive and more durable.
Once you have completed the transitional zone, you are ready to cut off the extra liner. Do this in stages, not all at once. First, leave about 12 inches (25 centimetres) of extra liner around the edge of the water-filled transitional zone. Make sure that the dirt is firmly packed around the edge of the transitional zone. Now you may do the final trim of the extra liner, leaving about 3 inches of liner (10 centimetres). When you fill the transitional area with material, you will cover this above-water liner, and you are done.
Determining Volume & Selecting a Pump
VOLUME :
Rectangle or square : length x width x height = cubic feet cubic feet x 7.5 = volume in gallons.
Circle : diameter x diameter x depth = cubic feet cubic feet x 5.9 = volume in gallons.
Oval : width x length x depth = cubic feet cubic feet x 6.7 = volume in gallons.
SURFACE AREA:
Rectangle or square : length x width = area
Circle : r2 or 3.14 x radius (1/2 diameter) x radius = area
Oval :1/2 length x 1/2 length x 3.14 = area
The number of gallons per hour at DISCHARGE POINT should not exceed the number of gallons in your pond (unless you want to turn your pond into a brook). Volume at discharge point varies with the type of pump that you purchase, and will vary as your pump ages.
If you will be attaching your pump to a filter, fountain or piece of statuary, the attachment will usually specify the gallons per hour required.
We recommend placing the pump some distance from the discharge point to get the most thorough circulation of water. Horizontal distance accounts for a very small loss of volume at the discharge point, so this will not greatly affect your flow
Edging the Pond
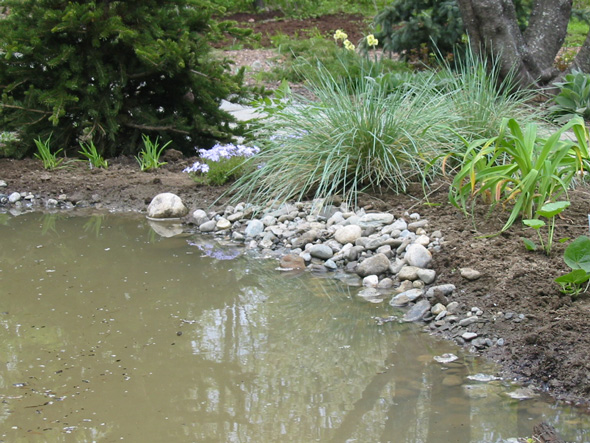
The natural edging that we like to use is also one of the simplest to build. Essentially, what you want to do is create a 4- to 12-inch (10 to 25 centimetre) 'transitional zone' around the pond, i.e. an area that is only 2-3 inches (5-7 centimetres) deep. This you will fill with whatever edging material you've selected. We usually add some clay-rich soil to this area, and then add a combination of round accent stones, gravel and perhaps a log. Water-loving plants like iris and primula will also thrive in this transitional zone. You will get cloudy water initially with natural edging, but eventually the soil will settle, roots will take hold, and your edge will blend seamlessly into the surrounding garden. Besides, cloudy water is good to have in the beginning, the soil will settle out onto the pond liner, making your pond bottom look natural.
The best way to create the transitional zone is to lay the liner over the excavation and fill the pond. Once the pond is full and the edges are roughly level, trim the liner leaving an 18 inch (35 centimetre) buffer where you want to have regular edging, and 24 to 48 inches (60 to 120 centimetres) where you want to have larger wet zones or bog areas (bog areas should be 4-6 inches deep rather than 2 inches). You will repeat this procedure all around the pond, dig the shelf a little deeper and pull it a little further back if you want to create larger moist transitional zones for iris and other water-loving plants. See the Pondforum Visual Pond Tutorial for a detailes illustration of these techniques. The formal edge is much more involved. Larger, deeper and more elaborate formal features will usually need to be poured in order to support the weight of the masonry edging where people may stand or walk, and to resist the elements. For the mostly smaller formal water gardens, which often do not require great depth, we have developed a durable and simple method of construction using cinderblocks, gravel, Sakrete, and a pond liner.
Begin by excavating a square or rectangular area with vertical sides, leaving 15 inches of extra space around the perimeter. In this area you will build the foundation for your edging. Step 1 of the foundation process is to dig a trench 3 inches deep and 12 inches wide, 8 inches out from the wall of the pit. The trench will overlap with the edge of the pond. Pack down the soil in and around the trench as firmly as possible. Fill the trench with medium-sized pea-stone and again pack the stones down firmly.
It is vital that this foundation be as close to level as possible. small mistakes underground will look very obvious when you edge the pond and fill it. Once the foundation is level, lay the cinderblocks, hollow sides up, on top of the gravel, and make them flush with where you want the edge of the pond to be. There should be 1 to 3 inches of gravel showing on either side of the cinderblocks. Stack the cinderblocks not more than 3 high and fill them with Sakrete. While the Sakrete is drying, you may fill in the area behind the cinderblocks with the same medium-sized pea-stone.
Now that you have laid the foundation for your edging, you are ready to line the pond. Pull the excess liner over and behind the tops of the cinderblocks and secure it. The final step in completing your formal pond is to edge it with whatever pavingstone is appropriate. Lighter materials, such as bricks or thin slate, will require mortar to be held in place. Thick, heavy slabs of bluestone or other material may not require mortar. Make sure that whatever material you use, it extends 2 to 3 inches over the surface of the water to hide the liner.
Pond Ecology
from algae to the Nitrogen cycle
By taking a few purposeful and informed steps at the outset of your pond's existence, you can save yourself hundreds in gimicky filters, obscure test kits, and dead fish. Your pond, despite its artificial nature, is in fact a part of nature, and as such it is governed by natural laws—with a twist. Here we will attempt to give simple explanations as to how these laws work, and as to how you can best put them to work for you in your pond.
But before we begin, one note. We are fond of saying that there are two types of people who get into ponds: plant people and fish people. What hobbyists need to keep in mind is that a pond heavily stocked with fish has more in common with a fish tank than with a garden. Most of the complaints commonly heard about pond problems and maintenance come from fish people who run their ponds like water gardens when they should be running them like fish tanks.
Therefore, know what kind of pond person you are from the beginning and know what you're getting into. Fish ponds are significantly more work than lily ponds, and should almost be thought of as another hobby. The principles put forth in these pages are relevant for both types of hobbyist, but our general philosophy and most of our techniques and solutions are lily pond-oriented.
Nature's Nitrogen Cycle
An ecologically balanced pool requires far less time and expense to maintain than one that is perpetually out of whack. Below is a simplified diagram of the nitrogen cycle which will be in operation soon after you stock your pond. Complex compounds aside, the two most important factors in determining the health of your pond are the number of fish and plants that you have at any given time. Fish produce a lot of waste which turns into ammonia and nitrite, and if you opt to feed your fish (which you should not if you are aiming for a balanced pond) the excess food will combine with other decaying materials and will contribute further to the presence of these substances.
You should think of plants as removing these toxic substances from the water. In reality, ammonia and nitrites are removed from the water in a complicated microscopic bacterial process, which is touched upon above. As a rule of thumb think of the natural cycle in your pond as being Fish Eats Plant, Fish Excretes Waste, Plant Eats Waste, and around and around.
Using this paradigm, there are just two scenarios that should be avoided at all costs: 1. too many fish will over-graze the plant population and they will eventually starve or choke on their own wastes, and. 2. too few plants will cause a build-up of Nitrate which, coupled with the higher sunlight level from lack of surface cover, could cause algae blooms.
Plants love nitrate, so if you don't give algae any competition, it's the only plant that will thrive in your pond.
It is not really possible to have too many plants, or too few fish. Once fish are introduced, they will grow quickly in size and number. Unless natural predators have access to your pond (you may be surprised), you will probably have to cull your own population from year to year.
Those who envision a frothy mass of koi feeding from the hand will not be able to sustain a balanced ecosystem unless the size of the pond is measured in hectares. For true fish hobbyists we recommend using a non-dusty pellet food as sparingly as possible and purchasing a sturdy bio-filter to remove the excess Ammonia and Nitrite from the water. In these cases, the lily pond is best thought of as a fish tank, and maintained accordingly.
Stocking Pond Plants :
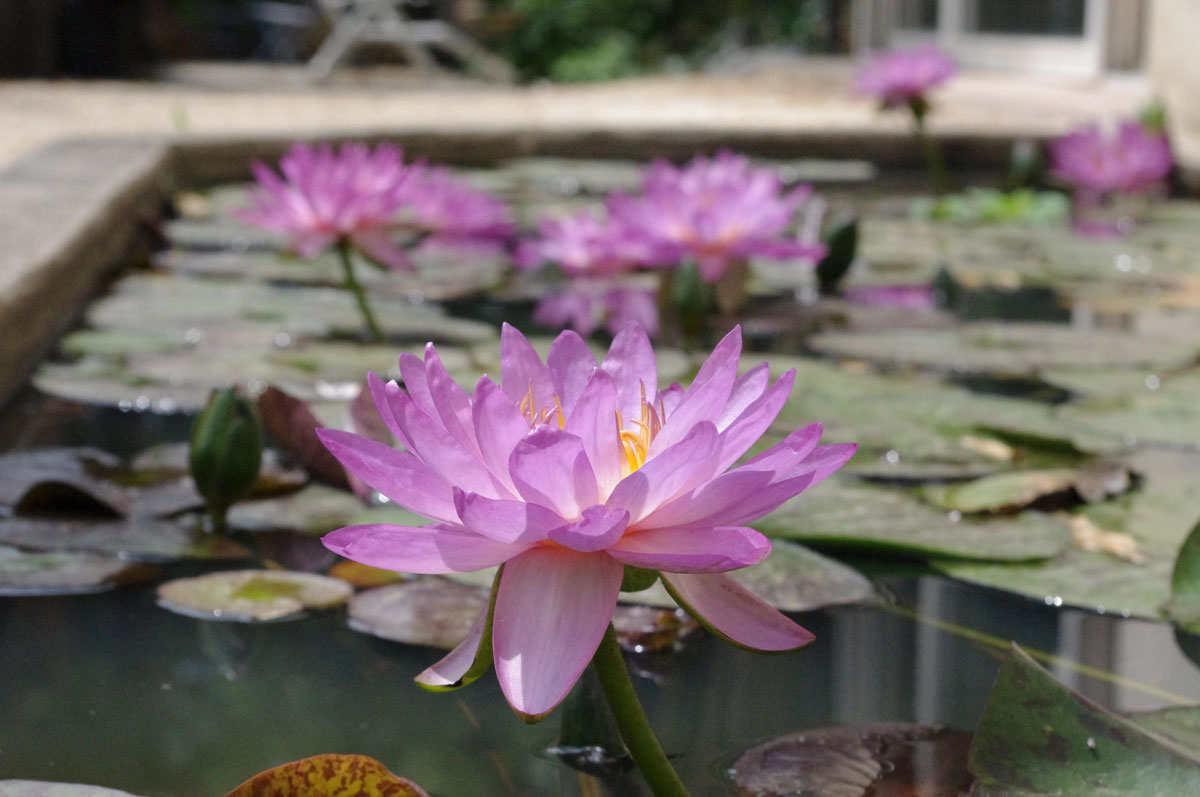
When stocking the pond many people are surprised at how many plants are required and how few fish. The general rule for plants is that the surface should be at least 50% covered at all times by floating plants such as duckweed and waterlilies. Southern and desert water gardeners need to follow or exceed this amount of coverage, otherwise smaller ponds will overheat. Adhere to this guideline unless your pond has more than 500 square feet of surface area, at which size coverage can be lower.
Submerged plants should be dropped in at an amount of 1 bunch per square foot of surface area. If your pond has more than 200 square feet of surface area, 1 bunch per 2 square feet of surface area will suffice. Keeping the surface of the pond covered will screen the solar energy that algae blooms need to grow. The submerged plants will help to oxygenate the water and in doing so will use the same nutrients to grow that algae would otherwise use. While inhibiting algae growth the plants will be absorbing nitrate and carbon dioxide from the water, as well as providing grazing material for your fish.
Stocking Pond Creatures :
As far as fish are concerned, there should be not more than one to two inches of fish per square foot of surface area, and ideally less than that, but if the depth of your pond is an average of at least 30 inches it could support a few more. The danger, mentioned in the previous section, is that the fish will grow so large in size and number that they will devour your pond's plant life faster than it can replace itself, and/or excrete too much waste, upsetting the natural balance of the pond. To avoid this, stock fish conservatively and monitor the growth and reproduction of your population closely. In a more perfect ecosystem the fish would be preyed upon by another animal, but chances are that the fish will be at the top of your food chain, leaving that responsibility to you.
In a conservatively stocked pond, the fish will not require any feeding at all and will still grow VERY fast. Those ponds chock full of fish will require hand-feeding according to the specifications of the purveyor of the fish. Remember, uneaten fish food and overfed fish produce waste in the pond that will lead to problems such as algae blooms.
Other creatures, such as mussles, amphibians, reptiles, snails and insects make wonderful additions to the pond, but whether or not they stay there will be a testament to the constancy and efficacy of your plant/fish ecological balance. Keep in mind that goldfish/koi and amphibians are not compatible, as the fish will eat any frog spawn and tadpoles they come across.
ll that said, before thinking about fish and frogs, the first animals that need to be stocked are the tiny and microscopic ones. When we finish construction on a pond, the first thing we do is go to a local wetland that resembles the environment we have just created - usually that means we find a natural pond, one in either sun or shade depending upon the garden pond we're stocking. We fill a bucket with muck (try to get mostly mud) from the bottom of this natural pond, and then we dump it into our pristine new garden pond. This jump starts the nitrogen cycle by introducing those bacteria that break down ammonia, and it gives them somewhere to live.
If you've ever cleaned a fish tank too well and had your fish die when you put them back in you already understand this principle - fish and plants need certain microorganisms to thrive. Ponds in nature aren't pristine, and yours shouldn't be either. As a rule, you should try not to disturb the layer of mud on your pond bottom because that is where your army of beneficial bacteria live, where your snails move, and where some of your plants will take root. Cleaning the pond means regularly removing excess organic matter like leaves, but not emptying it and hosing it out. In fact, sterilizing the pond is almost a sure-fire way to guarantee that any algae problem you had before will come back with a vengance later.
After adding our muck, we go ahead and add the water lilies and other plants, and after about a week the pond is ready to accommodate the pond animals we all know about.
Our experience with wild creatures is that they are finicky and delicate and many of them, particularly amphibians and insects, will arrive at your pond on their own if it is a suitable environment for them. It is possible to order many of these animals through the mail, but we believe that the best, cheapest and safest way for you to introduce animals to your pond is to go to a local wetland with net in hand. Anything you find there will be most likely to thrive and remain in its new home, and you will avoid the problem of introducing foreign creatures into your local ecosystem.
Snails can simply be dropped into the water, but before you introduce them make sure you have found algae-eaters and not the voracious leaf-eating type; these will decimate the plant life in your pond. The proper snails will improve water quality by keeping algae in check. Freshwater Mussels derive their meals from filtering tiny particles from the water. In so doing, they may help to keep your water clear, but make sure not to introduce them until your pond is suffiuciently established to provide them with enough floating sediment to survive. It is often recommended that mussels be placed in a tray full of sand or fine gravel in which they can move around; however, if this is necessary your pond is probably too clean for mussels. We suggest not introducing mussels until an inch or two of sediment has settled onto the bottom of your pond, making the tray unnecessary.
Insects, such as dragonflies and their larvae, will arrive on their own even if your pond is miles from a natural body of water. If your pond is closer than that to a natural wetland, other water-dwelling insects may arrive over land. And some will arrive piggy-backed to the plants and animals that you introduce to your pond. The only insects that we recommend adding to the pond yourself are those that you can see on the surface, such as whirligigs and water striders. These are generally considered to be charming additions, and are basically harmless to fish and plants.
Insects can be an indicator of a problem with your pond's ecological balance, but rarely can they be the cause of one. The presence of mosquito larvae indicates a lack of oxygen in the water that must be corrected, as these larvae need stagnant water in order to grow. A few types of insect will devour plants, but by and large all of these pests are a delicacy for your fish—so the solution may be as simple as adding a few more. The giant water bug does eat small fish, but very rarely in a quantity that would require action on your part.
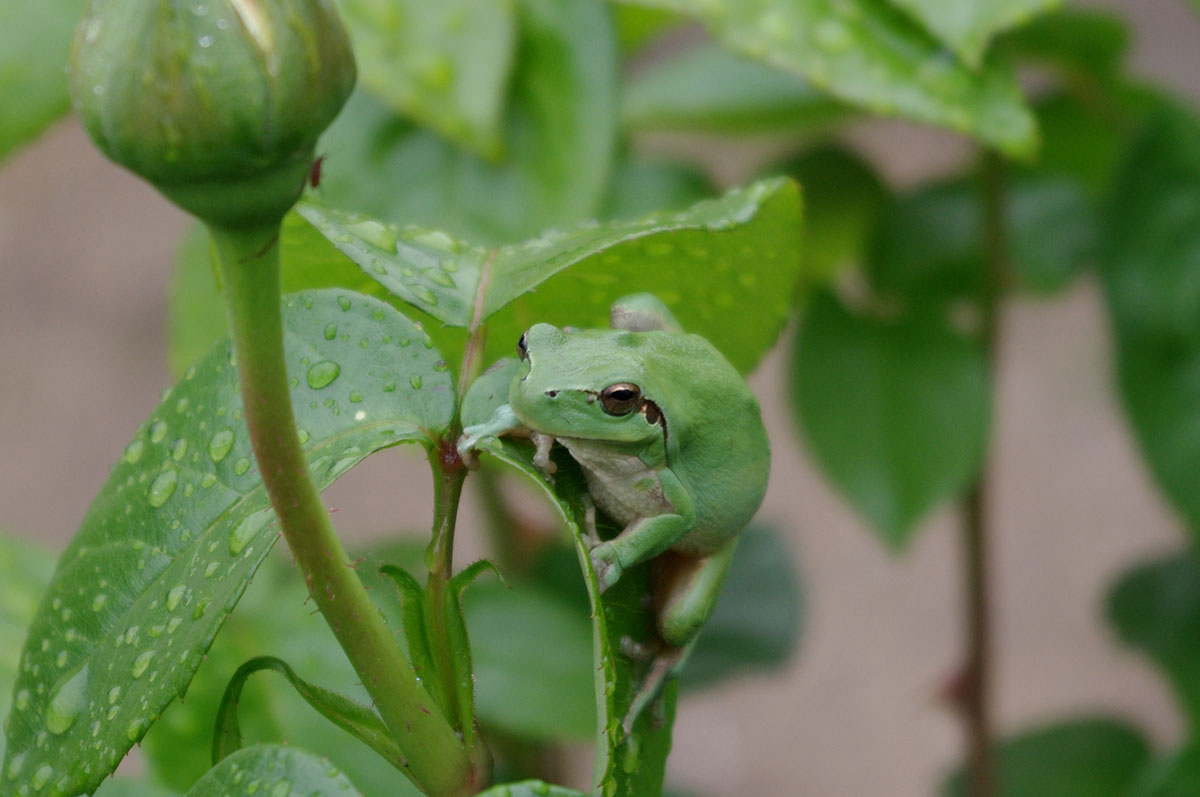
Amphibians and reptiles can be difficult to introduce. Some pond-owners find that their ponds are a magnet for hundreds of these creatures, others never see them. Rural water gardeners are more likely to find slimy and slithery visitors because they, frogs and salamanders in particular, require the damp cover of trees, bushes and dead leaves that only nature can provide. Suburban water gardeners will probably find toads using the pond in spring, as long as there is at least a large garden or some significant vegetation for them to live in during the rest of the year. The best method for introducing amphibians to the pond is to place them there while they are in the egg or larval stage of development. If your pond is suitable they will stay. If it is not, they will migrate. Unsuspecting suburban pond owners have been caught off guard by the din of hundreds of peepers in early spring (a truly deafening sound), so warn the neighbors!
If amphibians move in or decide to stay, reptiles are usually not far behind. Snakes are known to eat frogs and even fish, but they keep a very low profile. Water gardeners in southern climates should of course use extreme caution since some of these visitors may be venomous.
Turtles are even more difficult to introduce than amphibians. But again, a rural gardener may note the disappearance of his or her fish and find that a snapping turtle has moved in (this is very rare). When turtles leave, and they usually do at the first opportunity, the main problem is usually that the pond is too small to support the dietary requirements of the turtle, and the size may also leave the turtle vulnerable to attack by raccoons and other predators. Turtles can also decimate water lilies.
Dealing with Algae
There is a common theme that runs throughout this guide when it comes to maintaining lily ponds: keep it balanced. Algae is the classic symptom of a pond unbalanced. But as we have discussed elsewhere, some people do not have the option of creating a balanced pond because the pond was built in the first place to accomodate fish, not plants.
If you are a fish person, you must become very good at treating the symptoms of an unbalanced pond, and for this we have information sections and a plethora of filtration products to assist you. Plant people, however, can beat algae by making a few simple improvements to the pond.
Algae happens when the nitrogen cycle breaks down because of too much or too little of the various elements that make it all work. In the majority of problem ponds there is too much sunlight, too many fish, and too few plants. The waste from the fish creates an abundance of nitrogen in the water. There are not enough plants to absorb this nitrogen. The lack of plants also means that a lot of sun streams into the pond. This combination of abundant nitrogen and sunlight creates the perfect conditions for algae blooms.
The solution: get rid of all but a few fish and get yourself a lot more water lilies. The surface of the average pond should be 50-60% covered by floating plants. Small ponds and ponds in warm climates should have even more coverage. The main reason for this is that such small ponds are extremely sensitive to environmental factors like sunlight and excess nitrogen. If you dump a can of latex paint into Lake Erie it would cause a little mess, but imagine if you dumped a can of latex paint into your lily pond—it would be catastrophic. So when it comes to algae, think less fish and more plants.